
- Home
- Cheerleading and Gymnastics
- Physical Education
- Fitness and Health
- Tumbling Basics
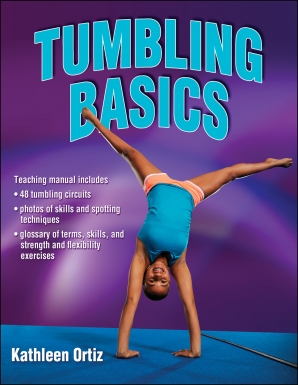
Tumbling Basics
184 Pages, 8.5
Tumbling Basics helps teachers new to tumbling break down each skill into small, easy-to-teach steps. This book focuses on seven tumbling skills that provide the basis for any tumbling program. With Tumbling Basics, you can learn how to safely teach the essential skills needed for tumbling.
Using the book's clear visual and verbal cues, you can guide the students through each skill—no matter your level of tumbling experience. Tumbling Basics also includes exercises to help students improve their strength and flexibility to perform skills successfully. You can also increase the challenge and fun using the book's tumbling circuits that give students a way to practice tumbling skills in various combinations.
For each skill, you'll find a description with step-by-step photos, then circuits that reinforce the new skill. Clear instructions on spotting techniques help you learn to safely guide students through difficult skills, and safety guidelines help you create an environment where students can practice without fear of being injured. This resource is packed with over 200 photos and illustrations and also includes rubrics for each skill. Tumbling Basics brings you the knowledge, tools, and confidence to incorporate a tumbling program, unit, or lesson into your physical education curriculum.
Tumbling provides both physical and mental challenges for your students. With the mastery of each new skill, students improve their physical strength, flexibility, and coordination and increase their mental discipline and self-esteem. By combining basic skills, exciting tumbling circuits, and safety guidelines and techniques, Tumbling Basics will help you uncover the challenge and fun of tumbling for your students.
Chapter 1. Preparing to Teach Tumbling
Chapter 2. Forward Rolls
Chapter 3. Backward Rolls
Chapter 4. Cartwheels
Chapter 5. Combination of Rolls and Cartwheels
Chapter 6. Front Limbers and Backbend Kickovers
Chapter 7. Front Handsprings
Chapter 8. Back Handsprings
Chapter 9. Combination of All Skills
Kathleen M. Ortiz is an instructor in the physical education department at Boston University. She is also an instructor in the physical education department at Massachusetts Institute of Technology in Cambridge. Ortiz was an adjunct professor for 10 years, teaching tumbling and gymnastics to future physical educators at William Paterson University in Wayne, New Jersey. She has coached athletes in gymnastics and cheerleading up to the Olympic level for more than 40 years and served as a gymnastics official in colleges for more than 30 years. Ortiz has been involved with the Special Olympics for more than 35 years. She has owned a gymnastics club and directed gymnastics programs, and she has been a head coach and written manuals for gymnastics clubs.
Ortiz received her bachelor of science degree in education from Ohio State University. She has been involved in many professional associations, such as USA Gymnastics and National Association of Women’s Gymnastics Judges. Ortiz served as the state education director in New Jersey for eight years and in Illinois for three years and is safety certified in gymnastics. She also served as the New Jersey State Interscholastic Athletic Association (NJSIAA) gymnastics rules interpreter from 2000 to 2011. Ortiz was president of the State Gymnastics Officials for five years.
Safety must be primary concern in any tumbling program
Safety is an extremely important aspect of any tumbling program.
Tumbling Basics!
Safety
Safety is an extremely important aspect of any tumbling program. Therefore, it must be your primary concern when setting up your equipment. USA Gymnastics has a safety handbook (Gymnastics Risk Management, 2009 Edition) that covers many aspects of safety, some of which are included in this section. Remember to be careful of traffic patterns. I typically have my students rotate in a clockwise manner. They realize this quickly and then automatically know how to rotate. Students rotate on a signal to keep from developing bottlenecks, so they are not tempted to cause disturbances. Also, make sure to maintain clearance from walls and doorways, unless a wall is being used as a support for a specific skill or exercise. Do not alter mats in any way, and always use them for their intended purposes.
You should keep records of any unusual occurrences or injuries. If an injured student is old enough, I let the student read the incident report and sign it or add anything I may have omitted. Keep these records for a very long time. If a student has sustained an injury inside or outside of your class, make sure the student gives you a doctor's note stating that he or she is allowed to participate fully in your class.
For some reason kids love to dive onto their heads. Remind your students that they must always practice safe landing procedures, which includes landing on their feet, to help prevent injuries. Do not assume they know how to land. Check to see that your students understand to land first on the balls of the feet and then the heels, not flat footed or on the toes. They need to bend their knees a minimum of 45 degrees on landings (many students will land with their knees locked, which can result in serious injury). They also need to maintain a hollow position in the trunk (abdomen drawn in with the backs slightly rounded). The trunk should be stable on landings. (See figure 1.1.)
Encourage your students to keep their eyes open when performing skills. Many students will close their eyes when they go upside down, which can result in a lack of kinesthetic awareness. Ask your students if they saw a body part, the mat, or something else in the gym, if you think their eyes were closed. This will help them to focus on maintaining visual awareness. Each chapter contains references to some visual cues. Also stress the importance of keeping the tongue inside the mouth during all skills. It's common to stick the tongue out while concentrating on a new skill, which can result in biting it.
When teaching new tumbling skills, always remember to teach the basics first. Do not push the students to learn new skills too quickly. Take your time and teach the skills in stages. Extra matting is never a replacement for students' readiness (USA Gymnastics 2009). Try to teach skills on each side (left and right) so that students develop equal strength and flexibility on both sides of the body.
http://www.humankinetics.com/AcuCustom/Sitename/DAM/094/fig_1_Main.1.png
Starting Your Class
Students entering the gym should not be allowed on the equipment until you have prepared them for the day's activity. Once everyone is assembled and ready, every class should begin with a warm-up. This should consist of 5 to 10 minutes of aerobic-type movement, such as running, hopping, skipping, jumping, dancing, jumping jacks, or any other high-energy movement that involves the large muscle groups. Students need to raise their core body temperatures so that their muscles are prepared to respond efficiently. Students should follow the aerobic warm-up with stretching of all the major muscle areas to prepare the body for movement. Each circuit contains a suggestion for warming up your students.
In some of the warm-ups, you may want to play a game or an activity. Vary the activities and be creative to add excitement and enjoyment. There are several activities, but here are a few:
- Stop and go. Use a locomotor skill like running, walking, skipping, hopping, crab walking, bear crawling, or jumping that you designate and demonstrate. Teach respect for personal space and spatial awareness by having them move without touching each other. When you say stop, they must stop; this reinforces listening skills.
- Freeze dance. Play music; students may dance or perform designated movements. When the music stops, students freeze. This provides many of same benefits as stop and go.
- Warm-up for young children:
- Students jump with bunny ears and stomp like kangaroos, which teaches them the difference between landing on the balls of the feet and landing flat footed as well as landing light and landing heavy. Repeat several times, getting progressively faster.
- Drop to prone position (face-down on belly). They can hiss like snakes, working the arms. You can use feelings here: Push up and say, “I'm mad. Do you know why I'm mad? I'm mad because it's raining outside.” Go back to prone, push back up. “I'm happy. Do you know why I'm happy? Because I got a new umbrella.” Down, up. “I'm sad. Do you know why I'm sad? I'm sad because I skinned my knee and it hurts.” Down, up. “I'm all better now because I have a cool neon bandage that glows in the dark.”
- Straddle stretch. Ask students to give you colors to paint each leg of their straddle and to touch their noses to the floor mat in the middle, then go side to side with arms high to paint rainbows.
- Pike stretch. Ask students what they would like on a sandwich. Place each sandwich item all the way down the piece of bread (legs), then put the other piece of bread (upper body) on top. This is a pike position. They can then eat their sandwiches.
- Tabletop. Ask students to put a pretend bunny on their belly. They lift the bunny up by pushing to a tabletop. Wave to the bunny by lifting one hand, then the other. Now wave with each foot. Oh, bunny's getting tired! Now rock over feet and shoulders and rock the bunny to sleep.
- Kneeling hamstring and flexor stretch. Students stand on one knee and place the other leg straight out in front. As they lean forward by bending the front leg in a kneeling lunge to stretch the flexors, they say, “Hello.” As they bend over the straightened front leg to stretch the hamstrings, they say, “Goodbye.”
- Late for school:
- Students are in a prone position (facedown). The alarm goes off late and they have to get up quickly to dress, eat, and brush their teeth. Then they jog in place to school.
- They get ready to cross the street. They say, “Oh, my gosh, there's a big truck!” Run fast! Made it.
- Still jogging, they say, “Oh, no, there's a banana peel!” They pretend to slip and fall, get back up, and dust themselves off.
- Keep jogging. They hear a warning bell at school. “Hurry, run!” Get in a seat just before the late bell.
- Continue with a stretch.
I've seen many other games; if you can relate the games to what the students are studying in another class, it could serve as a reinforcement to their other studies.
After warm-up, take time at the beginning of class to practice landing drills, such as jumping forward, backward, and diagonally and jumping with turns of 90 to 360 degrees with safe body control and awareness. Discuss and practice falling forward to a modified push-up position, backward stressing either a cradle position or reaching back with the hands turned inward (not outward), and falling sideways to a side roll. These are fun ways to learn how to fall safely.
Spotting
Sometimes it may be necessary to physically assist a student to safely and more accurately perform a skill. This is known as spotting the skill. Always be prepared for unusual occurrences and protect the student's head, neck, and back first and then other body parts. Remember to stand where the student is most likely to need assistance, usually while inverted, or during rolls when the student has pressure on the neck. Understanding the mechanics and body positions of the skill being taught will enable you to prepare for performance difficulties.
When spotting, set the area you are teaching in so that your back is never facing the class. Generally, your legs should be a little wider than shoulder-width apart for a good base of support. To protect your back, bend your knees when lifting the student , and try to spot the student near the body's center of gravity, a point in the body where the weight is evenly dispersed.
Spotting is a skill. If you are unsure about spotting, go to a local gymnastics club. Most coaches will work with you on your technique. Sometimes while spotting, you might accidentally touch a student inappropriately (that is, on the chest, buttocks, or crotch). Apologize quietly to reduce any embarrassment and make sure to make any necessary adjustments so that it does not happen again. Conversely, you may be struck by a student in an uncomfortable spot; do not make an issue of the incident.
Basic technique of the backwards roll
The backward roll is more difficult for students to learn than the forward roll, even though technique-wise the body passes through the same positions.
The backward roll is more difficult for students to learn than the forward roll, even though technique-wise the body passes through the same positions. You may decide to teach a cartwheel first, depending on your students' strengths. When you teach the backward roll, your first concern must be the safety of the neck. The students need to have enough arm strength to take the pressure off of their necks. The backward roll develops strength in the entire body as well as kinesthetic awareness. Following are areas of flexibility and strength your students will acquire while learning backward rolls:
Flexibility
- Neck flexibility is necessary for avoiding injury to the neck.
- Flexibility in the hamstrings and lower back is important while passing through compressed positions.
- Wrist work is necessary for placing hands back in the proper position and then pushing with them.
Strength
- Leg strength is necessary for standing up at the end of the roll.
- Arm strength is crucial for pushing the head off the floor.
- Abdominal strength is necessary for pulling the legs up and over the head.
Basic Technique
Students begin in a squat stand. They may use their hands in front of them for balance until they are ready to perform the backward roll. Once they are ready to begin, they will keep the head tucked to the chest, maintain a rounded back, and bring the hands above the shoulders, as if they are carrying a pizza (“pizza hands” with bent arms). They roll backward by dropping the buttocks to the floor and bringing the legs up over the head. Pushing must begin with the hands and arms just before the feet contact the floor. They should finish in a squat stand. (See figure 3.1.)
http://www.humankinetics.com/AcuCustom/Sitename/DAM/094/fig_Main._3.1.png
As with the forward roll, you may use multiple entries and exits once your class has mastered a basic backward roll. Here are examples:
Entries
- Tuck
- Straddle
- Single-leg sit
- Pike
Exits
- Tuck
- Straddle
- Knee scale
- Pike
- Scale
- Plank
Cueing
When performing the backward roll, students should look at the belly as they roll backward. This will aid in keeping the head tucked in and the back rounded to help diffuse the possibility of head or back injuries. While they are rolling over, tell your students to see their legs passing over their faces. This will help them roll in a straighter line. Upon landing, they should see their hands first and then look in the direction in which they initiated the roll.
Here are some verbal cues you might need to use while students are performing backward rolls:
- Roll legs up and over the head.
- Keep your back loose and flexible to round your roll.
- Push with arms to get your head off the floor and reduce pressure on the neck.
- Use a little momentum to help with rolling over.
- Use pizza hands and place them on the floor by the ears.
Safety and Spotting
The backward roll is a difficult skill because of the neck, especially in young children. In proportion to the rest of the body, a child's head is larger than that of an adult; therefore, a greater push off the floor is required in order for the child to clear the head and not injure the neck.
As a teacher, you must ensure that students have enough abdominal strength to lift the hips overhead and enough arm strength to push the head off the mat. This will relieve the pressure from the neck. One of the skills in the circuit, introduced by Rick Feeney (1990), involves placing the mats in a V-formation for the backward roll. It serves several purposes: It protects the neck from injury, teaches the student how to roll in a straight line, and teaches how to push with the hands and arms. Do not rush to have students perform the backward roll independently on flat mats until you have ascertained their readiness. When they perform this skill on a flat surface, be prepared to spot by lifting the hips up and over, consciously keeping pressure off the neck. The backward roll is a great skill for your students to learn because it helps them fall safely and helps them develop strength and agility.
Spotting a backward roll takes a little more practice than spotting a forward roll. Have a student start in a squat stand. Next, make sure the chin is tucked forward and the hands are by the shoulders with palms facing the ceiling. You should stand slightly behind and to the side of the student. As the student rolls backward, be prepared to reach in and grab the hips to lift their body up and over to the feet, keeping the pressure off the head and neck. Follow through to the completion of the element. Spot the student until she has a good understanding of hand placement and how to push with the hands to avoid a neck injury. (See figure 3.2.)
http://www.humankinetics.com/AcuCustom/Sitename/DAM/094/fig_3_Main.2.png
Here are some common errors you will need to watch for while students perform backward rolls:
- Rolling over one shoulder, possibly injuring the neck
- Lack of push or uneven push with hands
- Failure to stay round
- Lack of control with legs
- Landing errors
Read more from Tumbling Basics edited by Kathleen Ortiz.
Related Books


